 Welcome to another great sponsored post and giveaway!
When I was asked to do another tutorial for Ink & Arrow Fabrics, I begged them to let me be a part of the Camp S’more’s fabric launch. What glamper doesn’t want to deck out their camper out with some of this darling fabric? Click over to see the lookbook and then come back register for the giveaway.
See my last Ink & Arrow Fabric tutorial here.
Yep, you heard right, the lovely people at Ink and Arrow Fabrics are giving one lucky sewist/fabric junkie. Entry details are below the tutorial, keep reading!
This easy little quilt is just an enlarged quilt block inspired by a vintage quilt that I saw at one of my favorite antique stores. I didn’t buy it, but I did draw out the quilts simple block pattern so I could use it someday. Well, today is that day!
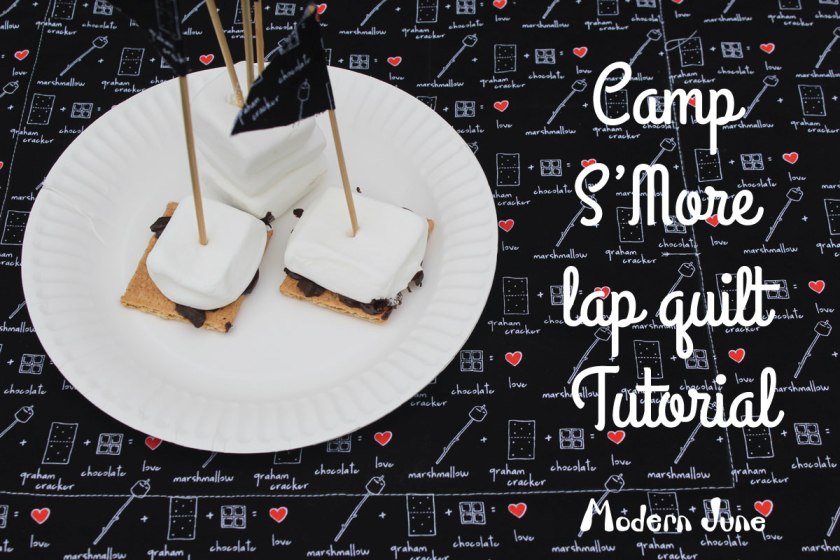
Camp S’mores Lap Quilt & Tablecloth Tutorial!
Finished Size: 45” x 45”. It’s the perfect size for a bistro table!
Supplies
3/4 yard Black S’mores Ingredients
2/3 yard Fireflies and Bug Jars
2 1/3 yard Pixie Dot
5 1/2 yards of pre-made 1/2 bias binding
48” square of batting (about batting )
Rotary cutter and mat
Clear ruler that is at least 6’’ wide
Large box of quilting safety pins
Note: It’s a quilters choice to pre-wash the fabric, for this casual everyday quilt, I opted not to.
Cut It Out
Quilt front
From S’more Ingredients:
Cut one 25” square and four squares that are 6” each.
From Pixie Dot:
Cut four 6” x 25” rectangles and 4 squares that are 6” each.
From Fireflies and Bug Jars:
Cut four 6” x 35” rectangles.
Quilt back
From S’more Ingredients:
Cut two 6” x 25” rectangles from the left over fabric.
From Pixie Dot:
Cut a 45” x 48” length of Pixie Dot. Sub cut this into two pieces, one measuring 34” x 48” and the other measuring 11” x 48”.
Batting
Cut your batting down to a 47” square.
Sewing it up

Quilt Top Construction
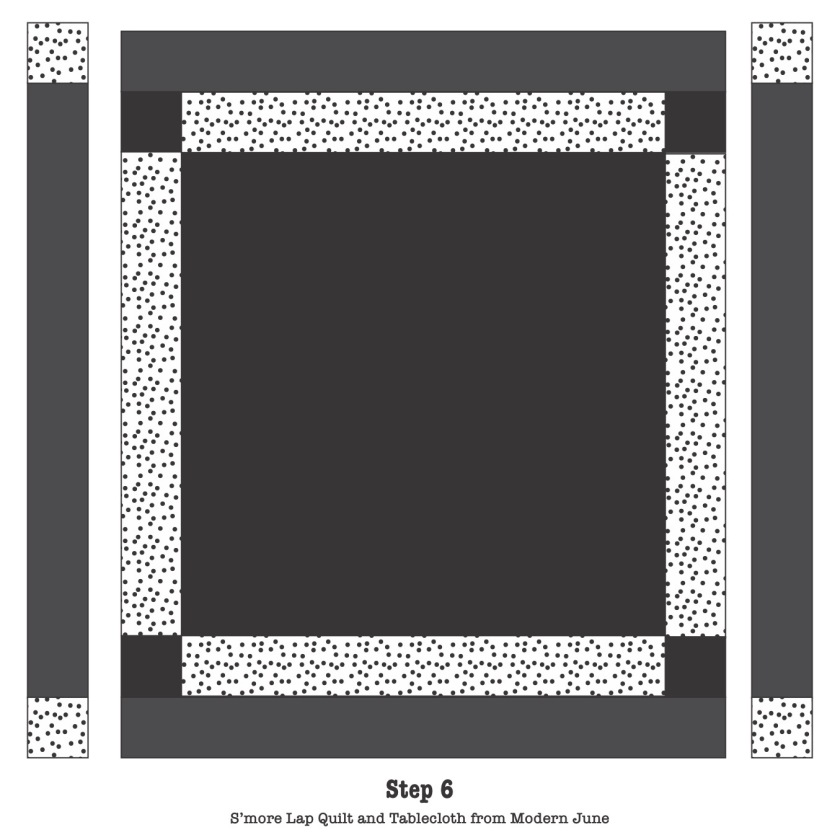
1. Start with your large 25” square of the S’more fabric and attach 6” x 25” rectangles to the top and the bottom. Press the seams towards the bottom.

2. Piece together one of the 6” x 25” Pixie Dot rectangles with a 6” square of the S’more fabric on the top and the bottom. Repeat to create another section. Press all seams upward.

3. Attach your two slim sections on either side of the first unit to create a larger square. Press seams outward, or away from the center.

4. Pin and sew a 6” x 35” strip of the Fireflies and Bug Jar fabric onto the top and bottom of the quilt top square. Press your seams away from the center once more.

5. Sew two 6” Pixie Dot squares onto the top and the bottom of Fireflies and Bug Jar rectangle (6” x 35”). Repeat once more. Press seams towards the center of the Firefly fabric.

6. Match up your seams and sew on the two slim sections from the last step onto the quilt top. Press seams away from the center, towards the outside of the quilt top.
Quilt Back Construction
7. Sew the 2 smaller pieces of S’more Ingredient fabric together to create on a long piece.
8. Sandwich the slim S’more unit in between the two large rectangles of Pixie Dot to create your quilt back. Press your seams away from the center.

Quilt It Up
1. On a large table spread out your batting and layer your quilt top out. Smooth out any lumps and bumps. Cut your batting down, so it’s about 1’’ larger than the quilt top.
2. Starting at the top of the quilt slowly roll up your quilt top and batting as if it were one and set it aside for a bit.
3. Smooth out the quilt back onto a large table so that the wrong side up and secure it with painters tape to keep it from sliding around during the next step. Tape it on all four sides, making sure to use plenty of tape.
4. Roll your batting/quilt top combo out onto your quilt back doing your best to keep the vertical seams in line with each other. Insert a fancy quilting safety pin in every few 8 to 10 inches.
5. Once you have pinned the entire quilt remove and discard the tape. Turn the quilt over and make sure that it is smooth of any wrinkles before stitching up the quilt.

6. Use tailor’s chalk to mark your quilt top with 2 squares in the center. Refer to the top stitch guide (above). After you sew the inner squares start top stitching inside of each square or rectangle. Position your pressure foot alongside each seam, and keep your needle in the center position and top stitch each section.
Tip: Since I don’t own a walking foot I found it helpful to take the quilt back to my table several times during the quilting phase, this ensured that the quilt wasn’t askew. I used my seam ripper a few time to course correct where needed.

Binding It Up
1. Prepare the quilt so that all 3 layers are flush and even with the quilt top.
2. Along one side of the quilt, pin the raw edge of the double fold bias to the front edge of the quilt. Pin the bias a few inches away from a corner, folding the end of the bias over 1/2”. Start sewing, using a 1/4” seam allowance, which is the first crease of the bias.
3. Stop 1/4” away from the first corner (see figure 1), and backstitch a single stitch. Lift the presser foot and needle. Rotate the quilt a quarter turn. Fold the binding at a right angle so it extends straight about the quilt and the fold forms a 45-degree angle in the corner (see figure 2). Then bring the binding strip down even with the edge of the quilt (see figure 3). Begin sewing at the folded edge. Repeat in the same manner at all corners.

4. Continue stitching until you are back near the beginning of the binding strip. Cut your bias off, so it overlaps and lays on top of the folded bias. This will encase your raw edges and make a neat finish.
5. Wrap the bias binding around the raw edge of the quilt and make sure to pin the corners into a neat mitered corner. From the quilt top side of the quilt, edge stitch the bias binding closed. Just line up the inside of your pressure foot with the edge of the bias and sew.

Now set that bistro table out on the front porch, it’s time to enjoy a spring s’mores party!

Now it’s time for the fun part, it’s giveaway time! To enter to win just leave me a comment on this blog post letting me know which of the Camp S’more prints you like best! Click here to the see the line of fab fabrics.
BUT WAIT THERE’S MORE!
Come back next week and see 3 more projects. Leave a comment on those posts to get even more chances to win. I’ll post again on Monday, Wednesday, and Friday. I’ll pick a winner on Monday, June 15th.
One lucky winner will receive all the fabric and bias tape needed to complete this project.
 I can’t wait to show you all my fun projects for this Camp S’more Series. See you all again next week! Be sure to sign up for email notices, or add me to you Bloglovin’ account’ so you don’t forget.
Happy sewing,
Kelly

This is super, super cute! You are so talented!! Cannot wait to see the next project.
LikeLiked by 1 person
You are too sweet! Thanks Larae!
LikeLike
So cute! Love those Fireflies and bugjars in black – really nice and something I could use for a boy!
LikeLiked by 1 person
I like all of them but maybe the Teal Animal Camp Scene will be my favorite.
LikeLiked by 1 person
Right? LOL!!
LikeLike
Love the campers and tents! They are all great and your project looks fun.
LikeLiked by 1 person
Fun project!!!!!
LikeLiked by 1 person
Pingback: Quick and Easy S’mores | Modern June
Pingback: Crafty Camp Smore Tutorial | Modern June
Fireflies and bug jars in green. So cute!
LikeLiked by 1 person
Oh, that is a cute one!!
LikeLike
Pingback: Camp S’more Series: Camping Stool | Modern June
TOO CUTE! Love your projects! Thanks for sharing it+a neat giveaway too!
LikeLiked by 1 person
I’m so glad you like the fabric and the projects!
xoxo,
Kelly
LikeLike
Very cute project! 🙂
LikeLike
Thanks!! xoxo
LikeLike
Pingback: Camp S’more Series: Pillow-Palooza! | Modern June
I just love all of those cute prints! But if I had to just choose one, I would choose the picked campers. Adorable!!! Thank you for the giveaway!!
LikeLiked by 1 person
I love them all too!
LikeLike
Love all these fabrics.
LikeLiked by 1 person
Aren’t they all adorable?
LikeLike
I love the green trees! Too cute!
LikeLiked by 1 person
Ariane T!! The ranadomizer picked you as our winner!! Please send me an email at Kelly@modernjune.com and give me your address!
xoxoxo,
Kelly
LikeLike